Solar Security Lights: Lumens, Sensor Angles & Placement That Actually Works
If your solar lights don’t trigger when someone walks up the drive—or they fade to nothing by 9pm—the problem is rarely the brand.
It’s usually the brightness you chose, the way the sensor is aimed, or where the panel sits. Here’s the straight-to-the-point guide to get it right the first time.
How bright is “bright enough”?
Lumens tell you how much light a unit produces. Pick the level for the job, not the biggest number on the box.
- Front door/porch: around 300–500 lumens gives a welcoming pool of light without blinding you at the threshold.
- Side paths and gates: 400–700 lumens is ideal for narrow walkways where you want clarity without spill.
- Driveways and parking spots: 700–1200 lumens makes reversing and unloading safer; dual-head designs help you spread light.
- Wide garden areas: 1200–2000 lumens across one or two units will “wash” larger spaces; aim heads in different directions rather than blasting one spot.

Sensor angles and mounting that actually trigger
Solar security lights use PIR sensors that pick up movement of warm bodies against a cooler background. They’re far more sensitive to movement across the sensor than straight towards it.
- Detection angle: A sweet spot of 120–150° covers most domestic layouts without catching passing cars.
- Distance: 8–12 metres is typical—plenty for paths, drives and sheds.
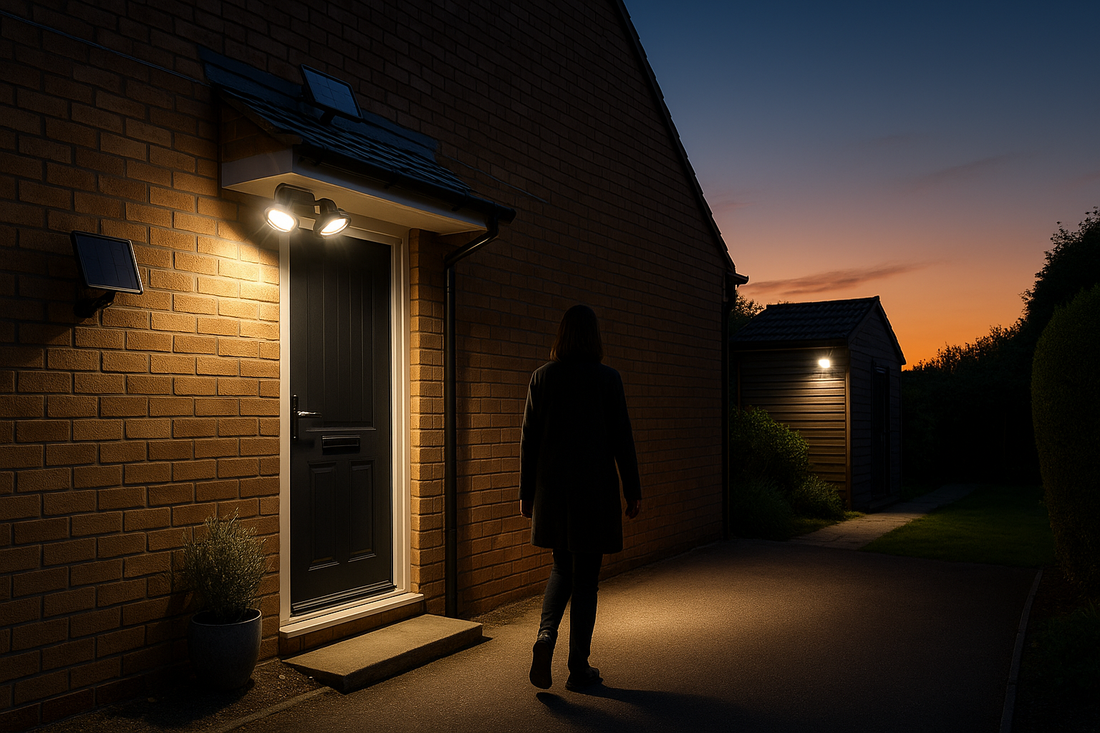
- Height: Mount at about 2.2–2.8 metres. Any higher and you light the birds; any lower and you reduce spread.
- Aim: Tilt the sensor and the light slightly downward and across the approach. Avoid pointing at roads, trees or busy pavements to reduce false triggers.
If your unit has two adjustable heads, try aiming one along the approach and one across the doorway/drive so movement from both directions is picked up.
Placement: panel in sun, beam where you need it
Solar performance lives or dies on sunlight hours—especially in a UK winter.
- Panel orientation: Face panels south or south-west, with clear sky from 10am to 3pm. Even a small amount of shading from gutters or branches can halve charge.
- Separate panel = lifesaver : For recessed porches or shaded walls, choose a light with a remote/cabled panel you can mount in the sun while the light sits where it’s useful.
- Front door: Mount just above or to one side of the door, angled down. Keep glare out of neighbour windows and off the road.
- Driveway: Two units at opposite corners (or one dual-head) give better coverage than a single, ultra-bright point of light.
- Side alley: Go a touch narrower on the beam and reduce sensitivity to avoid triggering on the street.
- Garden/shed: Aim the light towards the house (so you can see from inside) and the panel towards the sun.

Battery, modes and winter reliability
Short days expose weak setups. A few small tweaks make a big difference:
- Use motion-only mode in winter. “Dim all night” looks nice in summer but drains batteries fast in December.
- Right-sized pairing: A giant battery with a tiny panel is useless; look for units that highlight winter performance and efficient PIR control.
- Keep it clean: Wipe panels monthly—dirt and algae reduce charge more than you think.
Weatherproofing and build
For fully exposed installations, IP65 is the sensible baseline; IP44 is fine under a deep porch. UV-stable plastics or powder-coated aluminium housings last longer, and stainless fixings help near the coast. Adjustable light head and panel joints are worth paying for—they make tricky placements possible.
Common mistakes (quick fixes)
- Mounted in shade: Panel never charges → move the panel, or switch to a remote-panel model.
- Too high and flat: Light misses the ground → lower to ~2.4 m and tilt down.
- Neighbour glare: Over-bright or mis-aimed → choose neutral output, angle away from windows and the road.
- Constant false triggers: Sensor sees cars or foliage → reduce sensitivity, change angle, or nudge the unit a little further in.
- Battery dead by evening: “Always-on” mode in winter → switch to motion-only until spring.

A 15-minute install plan
- Pick the spot: sunlight for the panel, coverage for the beam.
- Mark height: about 2.4 m. Drill, wall-plug and fix the bracket.
- Set the mode: motion-only, medium sensitivity, 20–30 seconds run time.
- Aim it: sensor across the approach, light slightly down.
- Fine-tune after dark: adjust angle and duration once you can see the real beam pattern.
Choose just-enough lumens for the job, mount at the right height, aim the sensor across the approach, and make sure the panel actually sees the sun.
Get those four things right and your solar security lights will trigger reliably, illuminate what matters and keep working through winter—without annoying the neighbours.